Links and Articles Worth Reading
Sorting Your Website Images

Have you ever visited a website that was very wordy...just full of long, boring paragraphs? How long did it take you before leaving?? Too soon, right!?... And likewise when you land on a beautiful website that is graphically and visually amazing...some of them just take forever to load so that you can view it.
Website images play a key role in making your website informative, fresh, and enjoyable to scroll through, and most users want the information they're looking for to be in front of their eyes ASAP. A picture can replace a thousand words and a few words can clarify a picture.
But - there's an art and a process to choosing the right images for your website....don't worry...we've got you covered! Here is a quick run-through of the points to consider when choosing the right images for your website:
Look and Feel - The overall theme (design and colour scheme) of your website is important in choosing the photos you're going to use... Details like the colour of your website's background, fonts, and other elements actually matter much more than you would think. Make sure that every element in your website is cohesive and relevant to your brand and your niche...
Tip: Create a style guide for your website and stick to it! This will help make your website look cleaner, well-integrated, and professional.
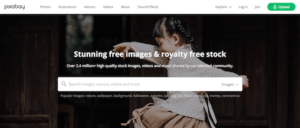
Free Images - Images from free image/video/graphics websites, such Pixabay, Pexels, and Unsplash are a great starting place.
- There's a few rules to stick to:
- Make sure you choose images that are natural looking and not 'contrived'.
- Don't get carried away with the options - keep to your style guide/theme.
- Do a reverse Google image search to make sure the images you choose aren't overused elsewhere.
- Make sure they are attribution free!
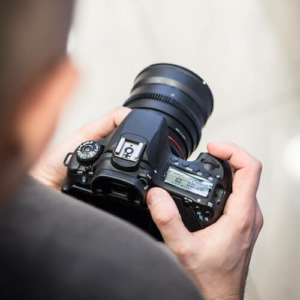
Photoshoot - please don't run out and take a bunch of phone photos for your website unless you really know what you are doing! Plan what you need and get a professional unless you know for sure you're a hot shot with the camera. Creating your own images is definitely a better option than using stock photos, but as you can imagine, it's an epic task to take on and do well. If you can afford a professional photographer, do it.
Legal issues - Check usage rights if you're finding images online...'free images' does not mean you can just use them...often there will be creative commons rules...like 'attribution required'. Personally, I don't like the look of the Attribution text on my sites so I choose images that do not require it.
If you don't know whether you can use an image you've found online, reach out to the owner. Find them via reverse image search if necessary, and if you can't find the owner - don't use it!
![]() About image editing - Enhancing, cropping, or removing backgrounds can change everything about your images! Before uploading them straight to you website, check the aesthetics of them first. They might need a little tweak on the lighting, sharpness, or maybe you need to alter the tone/colour so that all of your images match and look like they belong together.
About image editing - Enhancing, cropping, or removing backgrounds can change everything about your images! Before uploading them straight to you website, check the aesthetics of them first. They might need a little tweak on the lighting, sharpness, or maybe you need to alter the tone/colour so that all of your images match and look like they belong together.
Cropping and removing backgrounds on your images so that your eye just focusses on a key point can make the important elements pop out on the page. Cropping is not always a solution though...for example, leaving space in images works very well for background images especially...creating space for text overlays.
Image size and dimensions - Large image files will slow down your site, and they are very bad for SEO! Aside from that, because they take loooonger to pop up when a visitor arrives on your site for the first time, you'll be missing out on potential leads and sales because people are impatient, and will click away from your site if it takes more than a few seconds to appear.
First, you must choose the right image dimensions and then compress your images before uploading them. Compression is very easy with free online tools. These are our 2 favourites:
Rules for uploading images to your website
These are the steps we take and highly recommend you also do them before uploading images to your website.
- Resize with the appropriate dimensions (height and width)
- Optimise image
- Rename the file
- Once uploaded, add alt text, title, and description
You can also read this article for the complete guide on how to optimise your images for web: https://designdiva.com.au/marketing/how-to-optimise-images-for-web. Here at Design Diva, we follow the guide to make sure that the images and graphics will contribute to a better User Experience for our web visitors.
And to give you an idea of why is it so important to provide a better User Experience, check this article about Google's Page Experience Update:https://designdiva.com.au/marketing/googles-page-experience-update/
Recap:
Website images are essential in helping you communicate your messages effectively to your website visitors. Don't forget to take note of these aspects in order to choose the right images for your site.
- Look and Feel
- Consider a Pro photoshoot
- Search for free Images
- Check for legal issues
- Image Editing
- Image size and dimensions
- Optimise your Images
Think you need some help sorting your web images? Simply book your FREE web health check today and let's talk about your site!
How's Your Website Looking?
Old?...broken?...hacked?...Don't know where to start?
Book a Free Website Health Check
Don't have a website yet? Book a Strategy Call!